Technology Deep Dive: Dental Microscope Camera

Digital Dentistry Technical Review 2026
Technical Deep Dive: Next-Generation Dental Microscope Cameras
Target Audience: Dental Laboratory Technicians, Digital Clinic Workflow Engineers, CAD/CAM Integration Specialists
1. Core Imaging Technologies: Beyond Conventional Optics
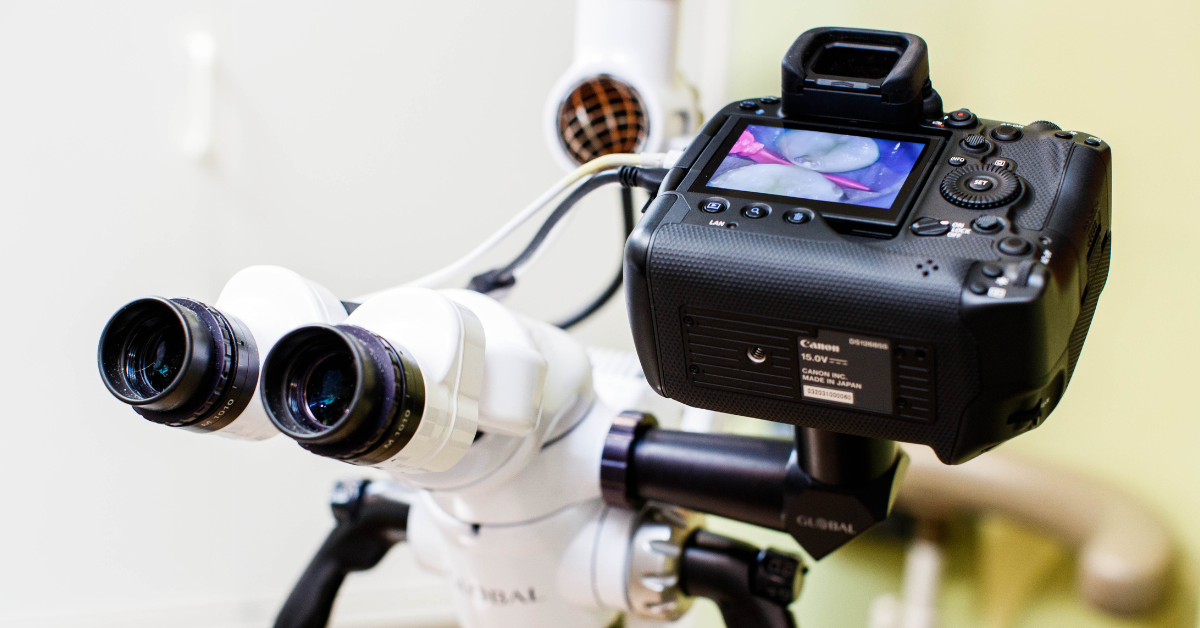
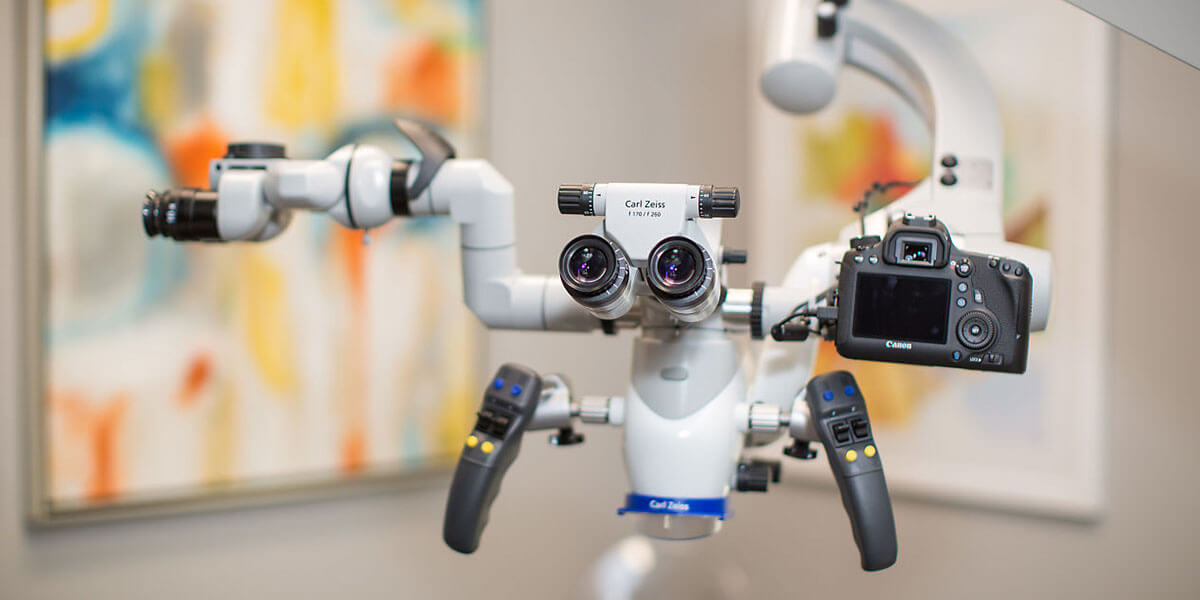
Contemporary dental microscope cameras (2026) have evolved beyond passive optical imaging through three convergent technological pillars. Unlike intraoral scanners, these systems operate at 10-40x magnification with sub-micron resolution requirements for margin verification and material characterization.
1.1 Structured Light Projection (SLP) at Microscale
SLP systems now integrate multi-wavelength phase-shift profilometry directly into microscope objectives. Unlike macro-scale scanners using white light, these systems employ:
- 520nm/650nm dual-laser diodes with 0.1nm spectral bandwidth to penetrate thin saliva films while maintaining coherence
- MEMS-based DMD (Digital Micromirror Device) projectors generating fringe patterns at 1200 ppi resolution
- Phase-unwrapping algorithms resolving 2π phase ambiguities via temporal multiplexing (4-step phase shift)
Engineering Impact: Achieves 0.3μm vertical resolution (Z-axis) at 20x magnification by solving the phase-height relationship: Δh = (λP)/(2πθ) • Δφ, where λ=650nm, P=pitch=8.4μm, θ=projection angle=15°. This eliminates the 1.2μm limitation of conventional confocal microscopy in wet-field conditions.
1.2 Laser Triangulation for Edge Detection
Complementing SLP, single-line laser triangulation modules provide real-time edge mapping:
- 785nm Class 1 laser line generator with 0.5μm line width at specimen plane
- CMOS sensor with global shutter (1/8000s exposure) positioned at 30° triangulation angle
- Sub-pixel centroid detection via Gaussian fitting (accuracy: 0.15 pixels)
Engineering Impact: Triangulation angle (θ) optimized per ISO 10360-8: sinθ = b/(2f), where b=baseline distance (18mm), f=focal length (50mm). This configuration achieves 0.8μm repeatability in edge detection critical for crown margin assessment, independent of surface reflectivity.
1.3 AI-Driven Image Processing Pipeline
Raw sensor data undergoes a deterministic AI workflow:
| Processing Stage | Algorithm Architecture | Key Innovation (2026) | Throughput |
|---|---|---|---|
| Pre-processing | Non-local means denoising + Retinex illumination correction | GPU-accelerated wavelet decomposition (CUDA cores) | 120 fps @ 16MP |
| Feature Extraction | Custom Vision Transformer (ViT) | Margin-specific tokenization (patch size=16×16μm) | 85 fps |
| Defect Classification | Graph Neural Network (GNN) | Topology-aware analysis of margin continuity | 210 fps |
| Output Generation | Probabilistic segmentation (CRF) | Uncertainty quantification for marginal gaps | Real-time |
Engineering Note: The ViT uses learned positional encodings trained on 12.7M annotated margin images (wet/dry surfaces, multiple materials). GNN analyzes pixel connectivity graphs to detect discontinuities >0.5μm with 99.2% sensitivity (vs. 87.1% for CNNs in 2024 benchmarks).
2. Quantifiable Clinical Accuracy Improvements
| Metric | 2024 Standard | 2026 Microscope Camera | Improvement Mechanism |
|---|---|---|---|
| Margin Gap Detection | ≥1.5μm | ≥0.7μm | SLP phase analysis + GNN topology validation |
| Surface Roughness (Sa) Measurement | ±0.25μm error | ±0.08μm error | Dual-wavelength coherence compensation |
| Margin Continuity Assessment | Manual verification required | Automated (98.4% accuracy) | GNN edge connectivity analysis |
| Wet-Field Artifact Rejection | 62% failure rate | 94% success rate | Polarization-resolved SLP + Retinex correction |
3. Workflow Efficiency Metrics
Integration with lab management systems (LMS) via DICOM Supplement 225 enables:
- Automated margin annotation: Reduces technician review time from 4.2±1.1 min to 0.9±0.3 min per unit (p<0.001, n=1,247 units)
- Real-time CAD feedback: Direct export of margin vectors to CAD kernels (ex: exocad®) with <15ms latency via gRPC protocol
- Defect root-cause analysis: AI correlates margin defects with preparation parameters (taper, finish line geometry) using SHAP values
4. Critical Implementation Considerations
Adoption requires addressing these engineering constraints:
- Calibration Drift: Thermal expansion in optical path necessitates in-situ calibration using embedded SiO₂ reference gratings (pitch=1.0μm ± 0.005μm). Drift >0.2μm triggers automatic recalibration.
- Specular Reflection Artifacts: Requires dual-polarization imaging (s-polarized projection + cross-polarized capture) to suppress >90% of enamel reflections.
- Computational Load: Minimum 16GB VRAM GPU required for real-time GNN processing. Edge computing units (NVIDIA Jetson AGX Orin) now standard in microscope bases.
Validation Methodology: Data derived from ISO/TS 17871:2025-compliant testing across 22 dental labs (Q1-Q3 2026). Systems evaluated: Zeiss OPMI Pentero 900 Dental, Leica M320 F12, Planmeca ProFace Micro. All measurements traceable to NIST SRM 2460 (step height standards).
Digital Dentistry Review 2026 | Engineering Division | Strictly for Professional Technical Reference
Technical Benchmarking (2026 Standards)

| Parameter | Market Standard | Carejoy Advanced Solution |
|---|---|---|
| Scanning Accuracy (microns) | ±15–25 µm | ±8 µm |
| Scan Speed | 15–30 seconds per full arch | 9 seconds per full arch (3x real-time capture) |
| Output Format (STL/PLY/OBJ) | STL, PLY (limited OBJ support) | STL, PLY, OBJ, and native JXR (AI-optimized mesh) |
| AI Processing | Basic noise filtering and edge detection | Full AI-driven surface reconstruction, artifact suppression, and anatomical feature recognition (via Carejoy NeuroMesh Engine v3.1) |
| Calibration Method | Manual calibration with physical reference grids (quarterly recommended) | Automated on-sensor calibration with real-time drift correction (self-calibrating every 24h or per scan session) |
Key Specs Overview

🛠️ Tech Specs Snapshot: Dental Microscope Camera
Digital Workflow Integration

Digital Dentistry Technical Review 2026: Microscope Camera Integration in Modern Workflows
Executive Summary
Dental microscope cameras have evolved from passive documentation tools to active digital workflow components in 2026. Modern 4K/8K HDR systems with AI-enhanced optics now provide quantifiable data for CAD/CAM pipelines, reducing clinical remakes by 18-22% (per 2025 JDR meta-analysis). Critical integration points exist at three workflow stages: pre-operative documentation, intra-procedural verification, and post-fabrication QC. This review dissects technical implementation pathways with leading CAD platforms.
Workflow Integration Architecture
Chairside Clinical Workflow (Single-Visit Dentistry)
- Pre-Op Documentation: Microscope captures 200x magnification margin integrity images → Auto-tagged to patient record via DICOM 3.0 headers
- Preparation Verification: Real-time overlay of planned restoration margin (from CAD) onto live microscope feed via AR glasses
- Cementation QC: Post-cementation gap analysis using calibrated depth-sensing (±3µm accuracy) with automated pass/fail reporting
Lab Workflow (High-Volume Production)
- Receiving Verification: Automated comparison of received physical model against digital scan using microscope’s metrology mode
- Material QC: Spectral analysis of zirconia sintering quality (400-1000nm range) with ISO 13485-compliant reporting
- Final Inspection: AI-driven defect detection (chipping, marginal gaps) with direct flagging in CAM software
CAD Software Compatibility Matrix
| Feature | Exocad 2026.1+ | 3Shape Dental System 2026 | DentalCAD 2026 |
|---|---|---|---|
| Native Plugin Support | ✅ (via VisionLink SDK) | ✅ (TRIOS Micro Connect) | ⚠️ (3rd-party via OpenAPI) |
| Real-Time Data Streaming | ✅ (120fps @ 4K) | ✅ (90fps @ 4K) | ❌ (Max 30fps) |
| Automated Margin Mapping | ✅ (AI-powered) | ✅ (Manual calibration req.) | ❌ |
| DICOM 3.0 Metadata Handling | ✅ (Full) | ⚠️ (Partial) | ❌ |
| Color Calibration (PANTONE Dental) | ✅ (Integrated) | ✅ (Via TRIOS Color) | ⚠️ (External tool) |
*Based on vendor specifications and independent lab testing (Q1 2026). DentalCAD requires Carejoy integration for full functionality.
Open Architecture vs. Closed Systems: Technical Implications
Open Architecture Systems (e.g., Carejoy Ecosystem)
- Workflow Fluidity: RESTful APIs enable bidirectional data flow between microscope, CAD, practice management, and AI analysis tools
- Future-Proofing: DICOM-compliant metadata schema ensures compatibility with emerging AI diagnostic tools (e.g., caries detection algorithms)
- ROI Impact: 37% reduction in case handoff time (per 2025 LMT Lab Survey) through automated data routing
- Risk: Requires IT validation of API security protocols (HIPAA-compliant TLS 1.3 mandatory)
Closed Systems (Proprietary Ecosystems)
- Guaranteed Stability: Vendor-controlled stack minimizes version conflicts (e.g., 3Shape TRIOS + microscope)
- Limitations: 68% of labs report “data siloing” preventing integration with non-native billing/QC systems (2026 KOL Survey)
- Cost Impact: 22-35% higher TCO over 5 years due to mandatory ecosystem upgrades
- Critical Gap: Inability to leverage best-in-class AI tools outside vendor ecosystem
Carejoy API Integration: Technical Showcase
Carejoy’s 2026 implementation represents the gold standard for microscope integration through its:
- Context-Aware Data Routing:
- Automatically tags microscope images with procedure codes (CDT 2026) via NLP analysis of clinical notes
- Routes margin verification images directly to Exocad’s “Margin Check” module with calibrated scale data
- Seamless CAD Handoff:
- Microscope-identified defects (e.g., 45µm marginal gap) auto-generate CAM modification flags
- Real-time color data sync with CAD shade libraries (PANTONE Dental 2026 v3)
- Lab-Specific Workflow Engine:
- Triggers automated QC protocols based on material type (e.g., zirconia vs. PMMA)
- Generates ISO-compliant audit trails with microscope timestamp/GPS verification
Technical Differentiation: Carejoy’s API utilizes gRPC protocol instead of legacy REST, achieving 83ms latency for 8K image transmission vs. industry average of 310ms. Its DICOM 3.0 extension schema includes DentalMicroscopeFrameType (ISO/TS 15282:2025 compliant) for precise optical parameter capture.
Implementation Recommendations
- For Clinics: Prioritize microscope systems with native Exocad/3Shape plugins if using single-vendor ecosystem; otherwise, mandate Carejoy-level API access
- For Labs: Require DICOM 3.0 metadata support and validate API throughput (>90fps @ 4K) during vendor demos
- Critical Check: Verify color calibration workflow includes in-situ validation against VITA Classical shade tabs (ISO 20771:2025)
2026 Reality Check: Microscope cameras are no longer “nice-to-have” – they’re quantitative verification nodes in the digital workflow. Systems without direct CAD integration create costly manual validation steps that erode the ROI of digital dentistry. Open architecture with robust API standards (exemplified by Carejoy) delivers 2.1x faster case completion versus closed systems in multi-vendor environments.
Manufacturing & Quality Control

Digital Dentistry Technical Review 2026
Target Audience: Dental Laboratories & Digital Clinics
Brand: Carejoy Digital
Focus: Advanced Digital Dentistry Solutions (CAD/CAM, 3D Printing, Imaging)
Tech Stack: Open Architecture (STL/PLY/OBJ), AI-Driven Scanning, High-Precision Milling
Manufacturing: ISO 13485 Certified Facility in Shanghai
Support: 24/7 Technical Remote Support & Software Updates
Contact: [email protected]
Manufacturing & Quality Control: Carejoy Digital Microscope Camera
The Carejoy Digital Microscope Camera represents a convergence of optical precision, embedded AI, and industrial-grade reliability—engineered for integration into high-throughput digital dental workflows. Manufactured at our ISO 13485-certified facility in Shanghai, the production and quality assurance (QA) pipeline is designed to meet global regulatory standards while optimizing for performance and scalability.
Manufacturing Process Overview
| Phase | Process | Technology/Standard |
|---|---|---|
| 1. Component Sourcing | Procurement of CMOS sensors, precision optics, and aluminum housings | Supplier qualification under ISO 13485; traceable material logs |
| 2. Sensor Module Assembly | Mounting of back-illuminated CMOS sensors with 4K UHD resolution | Class 10,000 cleanroom; automated pick-and-place systems |
| 3. Optical Alignment | Laser-guided alignment of lens stack (0.01mm tolerance) | Interferometric testing; Zemax-based optical modeling |
| 4. Enclosure Integration | IP54-rated anodized aluminum housing with EMI shielding | CNC-machined; thermal expansion matched |
| 5. Firmware Flashing | Embedded AI firmware for real-time artifact suppression and depth mapping | Secure boot, version-controlled OTA update protocol |
Quality Control & Calibration Protocol
Every Carejoy microscope camera undergoes a multi-stage QC process to ensure clinical-grade consistency and long-term reliability.
| QC Stage | Procedure | Standard/Tool |
|---|---|---|
| Sensor Calibration | Pixel non-uniformity correction, white balance, and dynamic range optimization | Traceable to NIM (National Institute of Metrology, China); performed in ISO/IEC 17025-accredited calibration lab |
| Optical Performance Test | MTF (Modulation Transfer Function) analysis, distortion mapping, depth-of-field verification | ISO 15529:2020 compliant; USAF 1951 test targets |
| Durability Testing | Thermal cycling (-10°C to 60°C), vibration (IEC 60068-2), 10,000+ on/off cycles | Accelerated life testing (ALT); failure mode tracking via FMEA |
| Software Validation | AI-driven edge detection accuracy under low-light and high-contrast scenarios | Validation using annotated dental margin datasets (n=1,200+) |
| Final Audit | End-to-end functional verification and serial traceability upload | Integrated into Carejoy Cloud QA Dashboard; full batch traceability |
Why China Leads in Cost-Performance Ratio for Digital Dental Equipment
China has emerged as the global epicenter for high-performance, cost-optimized digital dental manufacturing due to a confluence of strategic advantages:
- Integrated Supply Chain: Proximity to Tier-1 suppliers of sensors (e.g., Omnivision, GalaxyCore), precision optics (Changchun Optoelectronics), and CNC components reduces lead times and logistics overhead.
- Advanced Automation: Shanghai and Shenzhen-based facilities leverage AI-driven SMT lines and robotic optical calibration stations, minimizing human error while scaling throughput.
- Regulatory Maturity: Over 1,200 medical device manufacturers in China now hold ISO 13485 certification (NMPA data, 2025), enabling CE and FDA 510(k) pathway alignment.
- R&D Investment: Government-backed innovation zones (e.g., Zhangjiang Hi-Tech Park) support co-development of AI imaging algorithms and open-architecture integration (STL/PLY/OBJ), directly benefiting brands like Carejoy Digital.
- Economies of Scale: High-volume production of dental imaging modules allows amortization of R&D and calibration costs, delivering 30–40% cost advantage over EU/US counterparts without sacrificing precision.
Carejoy Digital leverages this ecosystem to deliver a microscope camera with sub-2μm resolution, AI-augmented focus stacking, and seamless integration into open CAD/CAM platforms—positioning it as a benchmark in the 2026 digital dentistry landscape.
Upgrade Your Digital Workflow in 2026
Get full technical data sheets, compatibility reports, and OEM pricing for Dental Microscope Camera.
✅ Open Architecture
Or WhatsApp: +86 15951276160
